Have a Question?
March 2012
You can subscribe to this Newsletter if you sign up for an account with Titan Reloading.
CLICK HEAR TO REGISTER AN ACCOUNT
CLICK HERE To browse an archive of past newsletters.
 MARCH 2012 NEWSLETTER
Robin and I are soooooooo looking forward to spring and all that it brings. It's been a somewhat mild winter but enough already. The birds have been a lot louder around here in the morning lately, but I can't tell if they're complaining like me or just happy to be this close. Either way, I like it. All the boys have reported for spring training now and the bats are crackin again, all is good!
We are truely enjoying all the friends we have made through Titan Reloading and look forward to many more. Feel free to contact us. Service and Support is our top priority. I have a day job so the best time to call for support is between 6-10 PM CST. I am able to answer emails throughout the day. Robin can take your service calls daily and will pass any support questions she can't answer on to me. As always, you will find many answers to questions in the "FAQ" and "Help Videos" areas of our website www.titanreloading.com
Dennis / Titan Reloading
Featured Product:
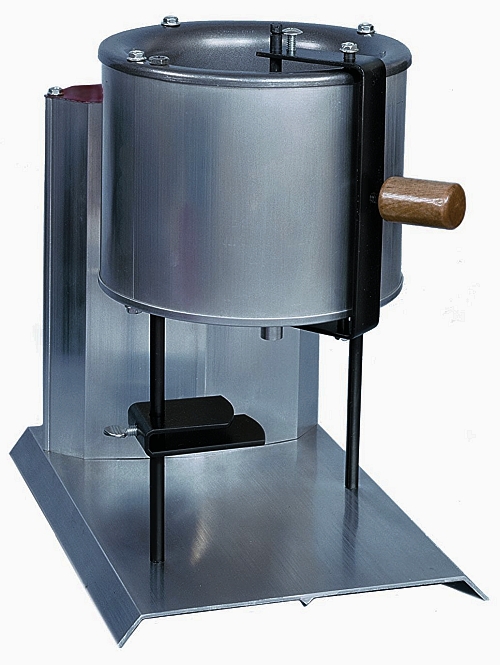
Lee Pro 4 Melter

20 Lb Furnace 110 Volt
Large diameter high capacity pot, holds approximately 20 pounds of lead. A generous 4 inches of clearance under the spout accepts all brands of bullet molds and most sinker molds. It also includes an adjustable mold guide to quickly and accurately position any mold for pouring. This second generation design incorporates the famous Lee patented high-efficiency design and dependable remote sensing thermostat, now in a dust tight housing. Long life 700-watt tubular heating element assures quick melting and rapid recovery. New micro adjustable, flow control valve adjusts instantly with a twist of the screw driver. Front mounted low maintenance replaceable valve spout allows instant reseating with a turn of a screwdriver.
220 Volt -90948 also available.
INSIGHT OF THE MONTH:.
Load Master Setup
I have talked about this in the past however we have made many new friends. This insight is critcal to the function of the Load Master press and I want to make it available. The follow are the first two steps of ten in an article found in our FAQ section. If these first two steps are followed most of any problems that can occur on a Load Master will be eliminated.
1. Each die in each set needs to be set properly so that the work is completed at the very top of the stroke. This is more necessary with a Loadmaster than a Dillon because the Loadmaster primes on the upstroke and it is an adjustable setting. Consider that if you set a die too deeply to prevent the carrier from reaching the top, and then set the primer seating depth to properly seat primers with this die set, everything works fine. Then, you switch calibers and the next die set allows the carrier to go further up – then your previously set primer system is now setting too deeply. All of the symptoms will show up – tilted primers, smashed primers, broken primer system parts, etc. In conclusion, all die sets should allow the carrier to go the top and have the work done at that location. If this is done, the primer system has to be set once and that’s it.
2. If the primer adjustment is set too deeply, what happens is that the primer slider has to try and place a primer up and on an already rising post. This results in damaged parts and mounds of frustration with the above symptoms. This is how to set it properly, but after doing so, operation has to be done in conjunction with #1. With no turret in the press, put a fired case (with spent primer in it) into station one and advance it to station #2. Be sure the primer seating depth bolt (on the left side of the press) is turned as high as it will go. When the carrier is at the top with the fired case in station #2, hold the handle down to keep the carrier at the top. With your left hand, push the primer rocker arm (the lever that the depth bolt pushes) down as far as it will go. This puts the priming plunger up tight against the bottom of the case. Turn the primer depth bolt down to meet this location (until it stops), lower the carrier and turn the bolt down further not quite a half turn more and secure it. Along with #1, you have just solved the priming problem that many complain about.
Follow this link to the complete article where other topics of interest are discussed.

